Skyrim Mod:SkyProc/Getting Started
Contents
Get a Java IDE[edit]
There are two things you need to start writing code:
-
- The Java SDK
- A program to write code in, known as an IDE.
SkyProc source code is written using the program, or IDE, called Netbeans. Another common IDE used for writing Java is Eclipse.
If you are new to Java, it is suggested you get the NetBeans and JDK bundle'.
SkyProc requires Java 7, http://www.oracle.com/technetwork/java/javase/downloads/jdk-7-netbeans-download-432126.html is the current NetBeans & JDK bundle.
From this point on in the guide, it is assumed you have Netbeans installed.
Link in the SkyProc Library[edit]
Centralizing Libraries[edit]
A library is a set of functions that are available for use. However, they must be properly linked in before you can make use of them in your code. It's usually a good idea to keep one copy of each library in a common folder (ex. "C:/My Java Libraries/"). This way, if any libraries are updated, you can replace them in this one common folder, and it will affect all your Netbeans projects.
In the SkyProc distribution, you will see a "Libraries" folder that contains:
-
- skyproc - A library with all the functions that deal with Skyrim mods (the ones you'll be using)
- lev - A custom library that offers many custom-tailored functions and objects. This is used by SkyProc, and therefore required.
The first step is to drag all of these folders into your common java library folder (ex. "C:/My Java Libraries/"). Anytime you get a SkyProc update, you do this step and replace the old libraries with the updated ones.
Link to NetBeans[edit]
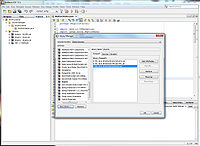
Now that the libraries are on your computer, Netbeans needs to know where to find them. Open the libraries panel:
-
- Open Netbeans -> Tools -> Libraries (or Ant Libraries)
Add a new library and name it "skyproc". Then, under the Classpath tab, add skyproc.jar
Add a new library and name it "lev" Then, under the Classpath tab, add lev.jar
Your screen should now look like the picture to the right. Click OK, and SkyProc should be successfully linked into Netbeans. Anytime you want to link to SkyProc, Netbeans will know where to look.
Link to Your Project[edit]
If you create a new project from scratch and want to link to skyproc, just right click the "Libraries" node in the Project Pane on the left, select "Add Library", and select the "skyproc" and "lev" libraries you just created. However, if you are just starting, it is suggested you use the SkyProc starter project provided in the distribution. It comes with the SUM standard already set up, which includes the default UI and other skyproc standard specifications.
The SkyProc Starter Project[edit]
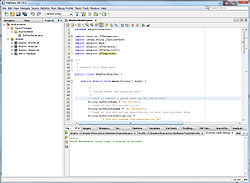
The SkyProc package comes with a basic starter project for the Netbeans IDE. Once Netbeans is installed, it should recognize and be able to open the starter project.
The starter project does everything needed to make a SkyProc patch except the custom preferences and custom code to make the changes to your patch.
Things you need to be aware of to tweak/change:
-
- importRequests static array - This is important to set correctly, as SkyProc will only import the record types you specify here. If you want to access or modify existing records from a user's modlist, you need to specify the record type here so that SkyProc will import it for you.
- onStart() code block - If you have anything special that you added that you want to initialize before SkyProc code kicks in. (For Example, Automatic Variants uses this block to do custom tasks specific to AV, such as moving AV Package textures to their correct positions, or reading in AV's blocklist.txt data.)
- onExit() code block - If you have anything custom you want to handle before the program closes. (For example, Automatic Variants uses this block to save the current AV Package list)
- runChangesToPatch() - This is by far the most important function to change. Here is where you will put all the code that creates your custom patch. NOTE that you should not export the patch in this code block. The starter project will handle exporting for you.
- myPatchName static String - Set it to your mod's name
- authorName static String - Set it to your name
- welcomeText static String - Text to display on the "front page"
- Colors and fonts you can set to your liking (headerColor, settingsColor, settingsFont)
- hasLogo() and getLogo() if you want to use that
- version static String - set to your version number
Customize the Patcher: Fireball Apocalypse[edit]
An empty patch isn't much use. Let's pretend for the sake of this tutorial that your end goal is to add the "Fireball" spell to every NPC in the game. It's a joke mod, right?
Give it a Name[edit]
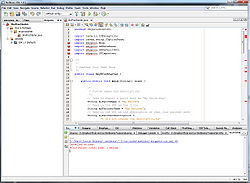
First, make sure to change the custom names and definitions. Now your custom strings look like this:
public static String myPatchName = "Fireball Apocalypse";

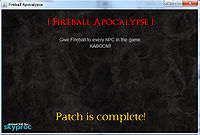
public static String welcomeText = "Give Fireball to every NPC in the game.\nKABOOM!";
This will make your final patch named "Fireball Apocalypse.esp", and adjust the title and description on the GUI.
Write the Custom Code[edit]
The next step is to add the custom code necessary to add Fireball to all the NPCs in the user's mod setup. This specific task is fairly simple, but the more complex the task, the more complex the logic. This is where some Java experience comes in handy.
SkyProc can do almost anything the CK can do. You can think of it as an automated CK patch creator. All that you need to do is code in the same logic you would use if you were to create the patch by hand yourself. In short, the logic would go like this:
-
- Go through each NPC in the game
- Add the fireball spell
Easy logic; Extremely time consuming to do by hand in the CK.
The SkyProc starter program has set everything up so that you can start coding the logic right away. It's ready, it just needs to know what to do. So, here's what needs to be done to make Fireball Apocalypse come to fruition:
-
- Find out the Fireball spell's FormID
- Create a FormID object.
- Iterate through all the NPCs
- Add the fireball spell to each NPC
So, let's get started.
Telling SkyProc Which Records to Import[edit]
First, we need to tell SkyProc which records we're interested in importing. We want to modify and export all the NPCs. To tell SkyProc that, modify the importRequests array to look like:
GRUP_TYPE[] importRequests = new GRUP_TYPE[]{
    GRUP_TYPE.NPC_
};
Fireball FormID[edit]
After some UESP research, you find that the Fireball FormID is "0001c789"
So, we want to create a FormID object in our Java program with that ID. Here's that code:
FormID fireballID = new FormID("01c789", "Skyrim.esm");
Looking at the FormID constructor, you'll notice it has two parameters:
-
- A string of the FormID of Fireball. (Notice the modindex is missing. You can include a modindex if you want, but it is unnecessary).
- A string of the mod name it is from. It needs to match the modname exactly (case insensitive).
So, now you've created a FormID with the Fireball id, and originating from Skyrim.esm.
Adding the Fireballs[edit]
First, we have to get the whole list of NPCs. The SkyProc starter project hands you a Mod object named "merger" that already has all the records from a user's entire load order in it (flattened to only have the last override of each record). This temporary merger Mod object has all the records SkyProc imported, and is your go-to place to get existing records. So, to get all the NPCs in a user's load order, you simply call:
FormID fireballID = new FormID("01c789", "Skyrim.esm");
merger.getNPCs();
Well, just getting all the NPCs doesn't do much good; We want to iterate through them. For this, we are going to use a "For" loop. It's a common looping keyword used in almost every coding language.
FormID fireballID = new FormID("01c789", "Skyrim.esm");
for (NPC_ n : merger.getNPCs()) {
   // Stuff we want to do to every NPC
}
The previous code in words is saying: "Get me the GRUP of NPCs in merger, and for every NPC_ n in that GRUP, I'm going to do ..."
What do you want to do? Add the spell fireball to the NPCs:
FormID fireballID = new FormID("01C789", "Skyrim.esm");
for (NPC_ n : merger.getNPCs()) {
   n.addSpell(fireballID);
}
One last thing we need to do is add the modified NPCs to the patch Mod object so that they are exported.
FormID fireballID = new FormID("01C789", "Skyrim.esm");
for (NPC_ n : merger.getNPCs()) {
   n.addSpell(fireballID);
   patch.addRecord(n);
}
And DONE! Running this program will now iterate through all the NPCs in a user's entire load order (no matter what mods they have), and add Fireball to them, and export the modiified NPC records to a patch. FIREBALL APOCALYPSE!
Notes and FAQ about what we just did[edit]
An important note is that you DON'T want to put any exporting code after what we just wrote. Exporting is handled by the starter project.
And finally, one question you may have been asking yourself is why we didn't import Spell records, as we were dealing with the Fireball spell, no? The answer is that we didn't actually access or use any spell records. We knew the Fireball formID already, and just added its formID to the NPC's record. We didn't actually check anything inside the fireball spell, or modify it in any way, so we don't have to import it.
Bundling the Program for Distribution[edit]
Compiling to a .JAR[edit]
The standard compiling setup built into Netbeans compiles your code into a .jar file (ex "Fireball Apocalypse.jar", but then also puts a lib/ folder with skyproc.jar and lev.jar. This folder has to be present alongside your .jar, or the program won't run properly.
All these extra files are messy, and cause issues when someone uses an older version of skyproc, and overwrite the /lib folder with their older copies. Now someone else's program using a newer skyproc.jar doesn't function anymore.
That is not the way to properly distribute a SkyProc program.
The correct way to do this is using the custom compiler code included in the SkyProc starter project. This custom code bundles all the .jar files necessary together into one file: "Fireball Apocalypse.jar".
This single jar is then self-sufficient, and doesn't need an accompanying /lib folder. It also doesn't screw up other SkyProc programs.
To use this custom compiling code included in the starter project, follow these initializing steps:
-
- Go to the Files tab in Netbeans.
- Open up build.xml
- Change value="My Patcher" to the name you want to give to your jar file.
- Save build.xml
After you've done the initializing steps, anytime you want to make a new .jar file to upload (your first time, or just an update), do the following:
-
- Go to the Files tab in Netbeans
- Right click build.xml
- Click "Run Target" -> "Other Targets" -> "SkyProc-dist"
The .jar file will be created in the store/ folder in your project folder.
Zipping Up and Uploading[edit]
If you are using the SkyProc starter project, then there are certain specifications your file structure must meet in order to work. By default, your patcher .jar file MUST be in
Data/SkyProc Patchers/*** Your Folder Name ***/Your Patcher.jar
'If it is not in this location, it will not properly locate mods to import, nor will it export the patch to the data folder.
Maker sure to distribute the .jar file in a folder structure like above, rather than just a lone .jar file in a zip.
Do Some Testing[edit]
Before you pass out your newly created SkyProc program, you should do some tests to confirm it's working as intended. SkyProc and Java are powerful tools, and as we all know, "with power comes responsibility". With a more complex SkyProc program lots of things can go wrong, and even one line can throw a wrench in the system so that it either doesn't function, or does something completely unintended.
Once you have prepped your program for distribution, try it out on your own load order, and confirm the results work. Load the patch in the CK/SkyEdit/Tessnip and see if they load it okay. Open Skyrim and see if it crashes. Run around and see if you have mudcrabs shooting fireballs properly.
Once everything seems functional, then upload it.
Be prepared to get bug reports from users, as this comes with the territory. SkyProc is not hardcoded, and adapts to the user's load order. You may have not foreseen some circumstances, which could throw off some of your calculations or conditional statements. Keep improving, keep adapting!


