Shivering:Milchar
|
|||
|---|---|---|---|
| # of Zones | 6 | ||
| Occupants | |||
| Monsters (1 boss-level Monster) |
|||
| Important Treasure | |||
| Amulet of Disintegration 1 Blind Watcher's Eye plant Limark's Skull 1 boss-level Chest 1 Hollowed Amber Limb |
|||
| Console Location Code(s) | |||
| XPMilchar01, XPMilchar02a, XPMilchar02aSub, XPMilchar02b, XPMilchar02c, XPMilchar03 | |||
| Region | |||
| Mania | |||
| Location | |||
| Southeast of Hale, north-northwest of Split | |||
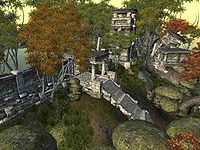
Milchar is a very large ruin in Mania located south and east of the town of Hale (quest-related). It contains six zones: Milchar, Nexus; Milchar, Tieras; Milchar, Chatterhall; Milchar, Xetrem; Milchar, Sufflex; and Grove of Reflection.
Related Quests[edit]
- Symbols of Office: Procure the two items needed to craft the Staff of Sheogorath.
- The Museum of Oddities: Una Armina wants you to find "Oddities" for her museum.
- Ghosts of the Hill of Suicides: Help free five wandering souls.
- The Coming Storm: Help Ahjazda prepare for the storm.
Notes[edit]
- The Grove of Reflection is inaccessible until stage 50 of the quest Symbols of Office. Once the quest is complete, the Grove will once again be inaccessible.
- A test cell related to this ruin did not make it to the game; "XPMilchar" is the code of a totally empty area.
- This ruin contains 101 Flame Stalk plants, 7 Screaming Maw plants, 2 Worm's Head plants, and 1 Blind Watcher's Eye plant.
Exterior[edit]
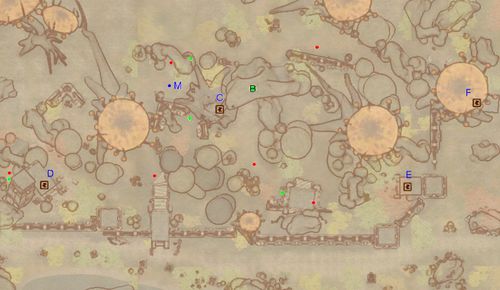
- The exterior is located at coordinates: SEWorld -3, 13
- This location's map marker (M on map) is named Milchar (editor name SEMilcharMapMarker). The entrance door is ESE of the marker, 80 feet away.
- 6 Monsters (Mania) are near the entrance
- 1 boss-level Hollowed Stump (Grummite variety) is at location B on map
- 1 Chest is near the entrance
- 1 Chest 01 is near the entrance
- 1 Urn (Wilderness; non-respawning) is near the entrance of Nexus
- 2 Urns (respawning) are near the entrance of Nexus and Sufflex
- The following plants can be found near the entrance: 9 Hydnum Azure plants, 7 Red Kelp plants, and 9 Worm's Head plants
|
Entrances: Entrances by quest: |
Zone 1: Milchar, Nexus[edit]
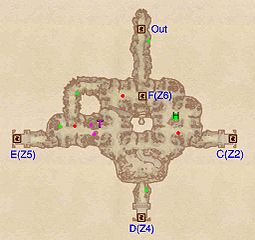
The name of this zone describes it to the letter: it is a nexus leading to each and every zone of the large ruin, with the exception of Milchar, Chatterhall. While all other zones have separate entrances from the exterior, the entrances from Milchar, Nexus are often preferable. See the individual zones and maps for details.
This zone offers some decent loot and is therefore worth exploring before heading anywhere else. The entrance to the Grove of Reflection (F) is inaccessible until the quest Symbols of Office so take the western tunnel and head around the Grove in a counter-clockwise direction, picking up all loot on the way (green dots on map). Do not forget to pick up the ultra-rare Blind Watcher's Eye plant at H and beware of the two Root Spikes traps at T. When you are done, pick one of the entrances to the other zones (C, D, E or F) and note that the outside entrance to Milchar, Xetrem (D from the Nexus) provides slightly easier exploration.
Occupants:
- 3 Monsters (Mania)
Treasure:
- 1 Blind Watcher's Eye plant at location H on map. It is located near a cluster of Flame Stalk plants, east of the entrance to the Grove of Reflection (F).
- 1 Chest
- 2 Hollowed Stumps
- 1 Hollowed Stump (Healing)
- The following plants will always be found: 67 Flame Stalk plants and 4 Screaming Maw plants
Traps:
- 2 Root Spikes traps at location T on map
Doors and Gates:
- There are five doors in/out of this zone
- 1 door (at Out) leads outside
- 1 door (at C) leads to the zone Milchar, Tieras
- 1 door (at D) leads to the zone Milchar, Xetrem
- 1 door (at E) leads to the zone Milchar, Sufflex
- 1 door (at F) leads to the zone Grove of Reflection
Zone 2: Milchar, Tieras[edit]
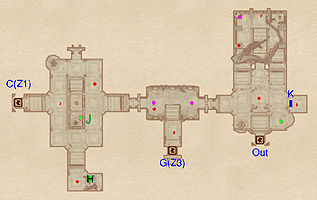
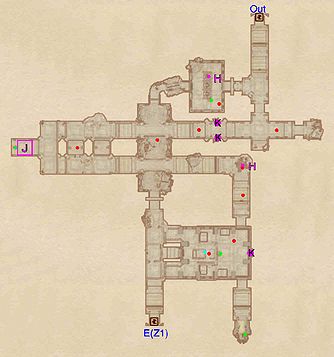
Whether you enter Tieras from Milchar, Nexus through door C or from the exterior through door Out, this zone merely functions as a passageway to Milchar, Chatterhall, home of the Amulet of Disintegration needed for the quest The Coming Storm. In the western room, near door C, an easy-to-access Hollowed Amber Limb can be found at H, while a chest and three repair hammers can be found at J. If you arrive from door Out, head down the stairs, watch out for a possible surprise attack from at monster behind the secret wall at K and avoid the fire from the scalon statue trap on the floor (purple dot on map). Regardless of route, make your way to the center of the zone, watch out for the two weaker scalon statue traps and enter Milchar, Chatterhall through door G.
Occupants:
- 5-9 Monsters (Mania)
Treasure:
- 1 Hollowed Amber Limb (1-4 Amber; non-respawning) at location H on map
- 2 Chests
- The other following items will always be found: 3 Repair Hammers
- The following plants will always be found: 28 Flame Stalk plants, 3 Screaming Maw plants, and 5 Mushroom Tree Sapling plants
- Some of the above items are clustered at location J: 1 Chest and 3 Repair Hammers
Traps:
- 3 Hunger Statue traps (will only fire once)
Doors and Gates:
- There are three doors in/out of this zone
- 1 door (at Out) leads outside
- 1 door (at C) leads to the zone Milchar, Nexus
- 1 door (at G) leads to the zone Milchar, Chatterhall
- 1 Secret Wall at K
Zone 3: Milchar, Chatterhall[edit]
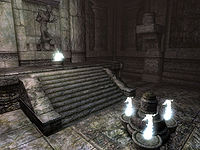
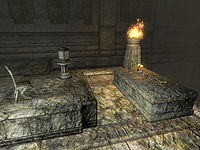
The main treasure in this area is a frozen chest (the Diligence Crux at Q) containing the Amulet of Disintegration needed for the quest The Coming Storm. In order to open it, you must use the Ritual Torch (T), which is in the brazier just below the Hunger statue. If you attempt to take it, a dialogue box will inform you that the torch "can be held by any, but owned by none" and therefore cannot be placed in your inventory. Use the grab control or a telekinesis spell to carry the torch and get all three braziers lit: one on each side of the door, and the one in front of the Hunger statue where you initially found the torch. This must be done quickly or the flames will burn out. The torch is tiny and easily dropped, but has a faint bluish glow to it, making it easier to find. Once all three braziers are lit, the chest can be opened. Once you have opened the chest, all braziers will be permanently lit.
Treasure:
- 1 Diligence Crux (contains Amulet of Disintegration; non-respawning) at location Q on map
- 1 Ritual Torch at T
Doors and Gates:
- There is one door (at G) in/out of this zone, leading to the zone Milchar, Tieras
Zone 4: Milchar, Xetrem[edit]
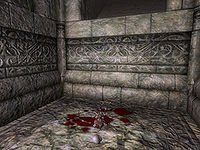
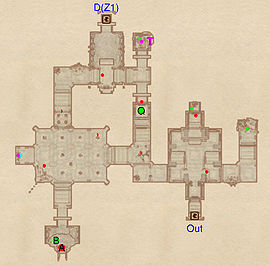
If you are here to claim Limark's skull for the quest Ghosts of the Hill of Suicides, entering through door Out is the quickest path as well as the most effective exploration of the rest of the zone. Before making your way to the skull, head east to loot an urn almost completely buried by debris. Once you're done, cross the bridge and head north at the intersection. Take the same fall that killed Limark and claim his skull (Q) from the blood-soaked floor.
Before entering the alcove to the north, watch out for a cave in trap (T) and then loot the nearby urn. Head west, ignoring door D, and enter the large southwestern room guarded by a hostile Hunger Statue (purple dot on map). Turn it off by pressing the button underneath it (cyan dot on map), then enter the southernmost tunnel and fight the boss-leveled monster (A) and claim the contents of the boss chest at B.
Occupants:
- 1 boss-level Monster (Mania) at location A on map
- 5-8 Monsters (Mania)
Treasure:
- Limark's Skull at location Q on map
- 1 boss-level Chest (Monster variety) at B
- 1 Chest (locked)
- 1 Chest 01
- 1 Urn (locked)
Traps:
- 1 Cave In trap at location T on map
- 1 Hunger Statue trap (purple dot on map)
Doors and Gates:
- There are two doors in/out of this zone
- 1 door (at Out) leads outside
- 1 door (at D) leads to the zone Milchar, Nexus
Zone 5: Milchar, Sufflex[edit]
Your exploration of Milchar, Sufflex depends entirely upon your choice of entrance; either from the Nexus through door C or from the exterior through door Out. However, unlike the other areas of Milchar, this zone contains little of interest and is rather straightforward. The southernmost room is worth visiting because of the sacrificial altar with a dead Skeleton on top. Open the nearby glass display and activate the button (cyan dot on map), then watch as the Scalon Statue at K blows up the skeleton. Loot the locked chest downstairs and locate the Hollowed Stump in the southeastern tunnel. To loot the two remaining chests (green dots on map) head north and follow the corridors, making sure to avoid the trapped floor at J, the two Cave In traps at H and, especially, the two Scalon Statue traps opposite each other in the hallway (K), as they will hit you at least once.
Occupants:
Treasure:
- 1 Chest (locked)
- 1 Chest (Healing)
- 1 Chest 01
- 1 Hollowed Stump
Traps:
- 2 Cave In traps at locations H on map
- 3 Scalon Statue traps at K
- 1 Trapped Floor trap at J
Doors and Gates:
- There are two doors in/out of this zone
- 1 door (at Out) leads outside
- 1 door (at E) leads to the zone Milchar, Nexus
Zone 6: Grove of Reflection[edit]
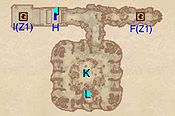
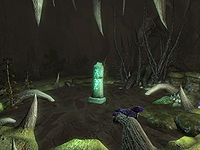
During the quest Symbols of Office, Dyus asks you to retrieve a branch from the Tree of Shades. At that point, the entrance from Milchar, Nexus will be unlocked and you are free to enter. Once inside, jump down to the lower floor and avoid the button (cyan dot on map) next to the secret wall at H, as you will simply receive the message "An unseen force holds it fast". Once you arrive near the Tree of Shades (L), the Standing Stone at K will produce a dark and hostile copy of yourself, so be prepared for a hard fight. Afterwards, pick up the unique weapon Shadowrend and claim a branch from the tree. Finally, push the now-unfrozen button and exit the Grove via the teleportation pad (I).
Treasure:
- The following plants will always be found: 3 Alocasia plants, 3 Aster Bloom plants, 6 Flame Stalk plants, 3 Red Kelp plants, and 2 Worm's Head plants
Doors and Gates:
- There are two doors (at F and I) in/out of this zone, both leading to the zone Milchar, Nexus
- 1 Secret Wall at H
Other:
- 1 Standing Stone at location K on map
- 1 Tree of Shades at L
